HOW TO DO SIMPLE EDITING ON CAPCUT.
How to do Simple Editing on Capcut is a lecture to help beginners understand how to create stunning videos with capcut. I know that some might have been prevented because of the Capcut premium features.
We have to understand that Capcut is one of the easiest applications when we want to edit our videos. It has enormous features and a user-friendly video editing app. Many people use capcut to edit their videos before publishing the video on facebook.
YOU CAN READ
How to Sell Ebooks Online to Any Country of Your Choice
Content Creation and the Types of Content You can Create for Your Page
Step by Step Guide to Create an Ebook with Google Documents
How to Download and Install Capcut and Sign In with the Email and Password
What Is Capcut?
Capcut is a video auditing app, used to edit a variety of videos. Capcut offers a wide range of features to have a simple editing of your videos through the software. To edit your video on capcut, first of all, make the video with your camera, or store the already made video in your phone. Then follow these simple steps to get you started with basic editing on CapCut:
First here is to download capcut through google playstore or go to www.capcut.com and download the the software.
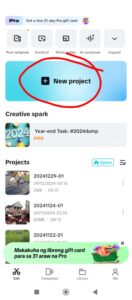
1. Open your capcut and click Create a New Project.
When you open the CapCut and tap on the “New Project button”. You will the image below
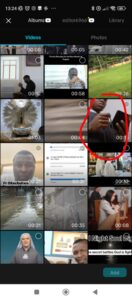
This will lead you to all the videos that you stored in your phone. Then try and choose the main video that you want to edit or if the videos are in clips (meaning that you have more that one short videos to select, select the short clips that you want to edit, from your gallery. So, choose the video clips or even images you want to edit from your device’s gallery. Like the image below
Then click the “add button” to insert the video in the timeline. Like the Image below

When you insert the video, clips or images that you want to edit, scroll to the right of the video to the to determine the length of the video.
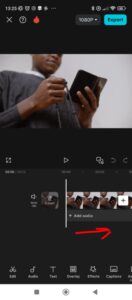
The tap on the timeline to adjust the volume. The timeline is that line i marked read below. See the image below
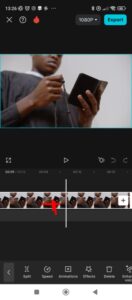
After tapping on the timeline, look below you will see the “volume button”, tap on it to adjust the volume.
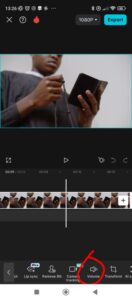
When you tap on the volume, you will see that volume adjuster, you can adjust to the end or half, depending on what you want.
2. Trim and Split Clips.
Then Choose the video clip in the timeline that you want to edit or the whole clip by tapping on the timeline. You can Then trim the length of the video clip, If the video is more than you required. If the video is at the normal range that you required, there is no need trimming the video.
If you want to trim: Try and drag the edges of the clip inward to reduce its length. Drag the timeline to the left. Like here in the image below
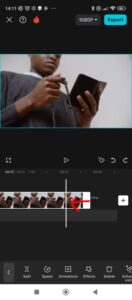
If the video is beyond where you want it to be, split the video and delete the splitted one by tapping on it and click delete
To split: You have to Position the playhead (the vertical line that moves to show your current position in the video) that is move to where you want to cut, then tap on the Split option (usually represented by a scissor icon). Check the image below
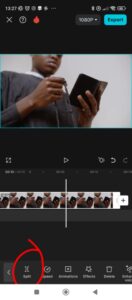
Once you tap on the timeline that you want to cut, the split option will show, then click on it, to split out the part of the video that you want to remove, tap on the timeline of the part of the video that you want to split out, then click delete, the split part of the video will be deleted. Like the image below
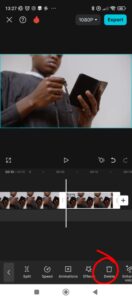
3. Next reduce the noise . Tap on the timeline again, scroll to the right, and click “reduce noise button” below the timeline
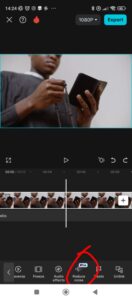
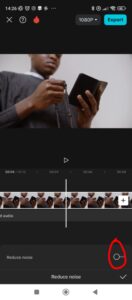
When you click on it, it will bring out a button, put on the button and click the Yes Icon. Like the image below
4. Next is How to Add Text
If you want to add a text, then you have to tap on the text option in the menu. Look at the below, you will see the text button.
Select the Add Text option and type your desired text.
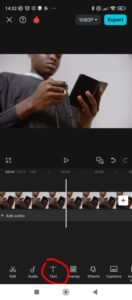
Then Click add text
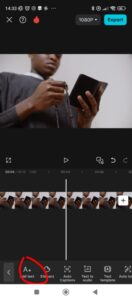
This will bring a box where you can type your text. Then You can try to customize the font,the size that you prefer, the colour that you want, and then the position of the text on the screen. We shall lecture on this specifically.
4. Then Insert Music or Sounds If you want
Tap on the Audio option in the menu.
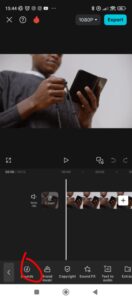
Choose from the built-in sound library, or upload your own music.
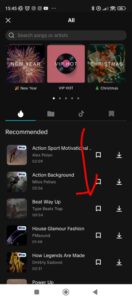
Or you choose the music from your device
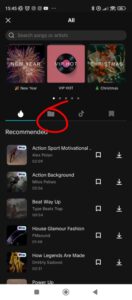
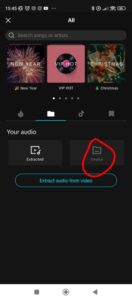
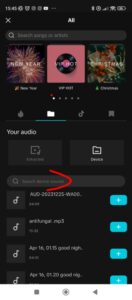
Search the device music you want to put
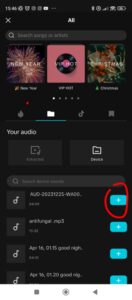
Tap on the plus sign at the right of the device music you want to put.
The timeline audio will be like this image when you click the plus sign.
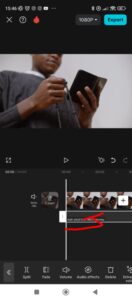
You can tap on the audio timeline and Adjust the volume and trim the audio clip as needed as I taught you before. then when everything is set, you can then export the video to your phone.
5. Export Your Video.
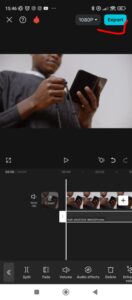
Once you feel you are satisfied with your edits, Then tap on the Export button (usually represented by an upward arrow).
Choose your preferred resolution and frame rate. Always choose 1080 p
Tap Export to save it to your device to share later or share it directly on social media platforms.
10. Review and Edit Further.
After exporting, you can go back to your project to make more edits if necessary.
In Our next Lecture, we shall face how to apply transitions, effects, filters and speed and proper editing of the text using the capcut, with how to use a background voice in your video.
Simple Editing On Capcut will help you to start editing on your video. You do not need to wait for tomorrow or next because of the difficulty in learning how to edit. Rather it will guide you how to edit properly your video. We encourage everyone to keep on practicing this so as to reach your aim and master the content publication.

Great job👍
Fr. Any follow video for this capcut