
Step by Step on How To Register with Amazon KDP and Sell Your Ebooks
To watch Our lecture on the 31st of January on Ebook Creation, click here
Amazon KDP is one of the best marketplaces one can sell his/her digital products. You can also watch this video on Youtube first. When you write your book, do consider selling it on Amazon KDP. This is one of the best, safest and easiest ways one can start earning online.
It is a massive market yet to be untapped. It is somehow difficult at first, but if you master the market, it will go a long way to help you market your products online.
The reason the Ebook market is highly profitable, is that it has no inventory,it does not involve shipping , no hassles and problems. Here, Amazon handles everything for you.
So, in this lecture today, I will guide you step by step on how to register in Amazon KDP. Then wait for the second lecture, because many people asking me how to register with Amazon KDP.
YOU CAN READ:
How to Sell Ebooks Online to Any Country of Your Choice
What Are Social Media Management Tools and Why You Need Them
THE SECRETS OF FINANCIAL DISCIPLINE
The Requirements
Bank Details and Swift Code
Then, Your Email
Your active whatsapp
Then, Your Phone number
Your TIN (tax Identification Number)
Step One
The first thing we have to do is to understand what Amazon KDP is all about. KDP here means Kindle Direct Publishing. Through this platform, you can upload your ebook, sell it on Amazon Worldwide, even through allowing Amazon to publish the hardcopy for you and you up to 70% royalty, despite that, you get paid monthly, while selling your ebooks and hardcopied books.
So, here, a website is not all that necessarily, unless you want to advertise there, use it as a landing page, or embed the links inside the website. Here at Amazon KDP, you don’t need any upfront payment, before your book is published.
Step Two
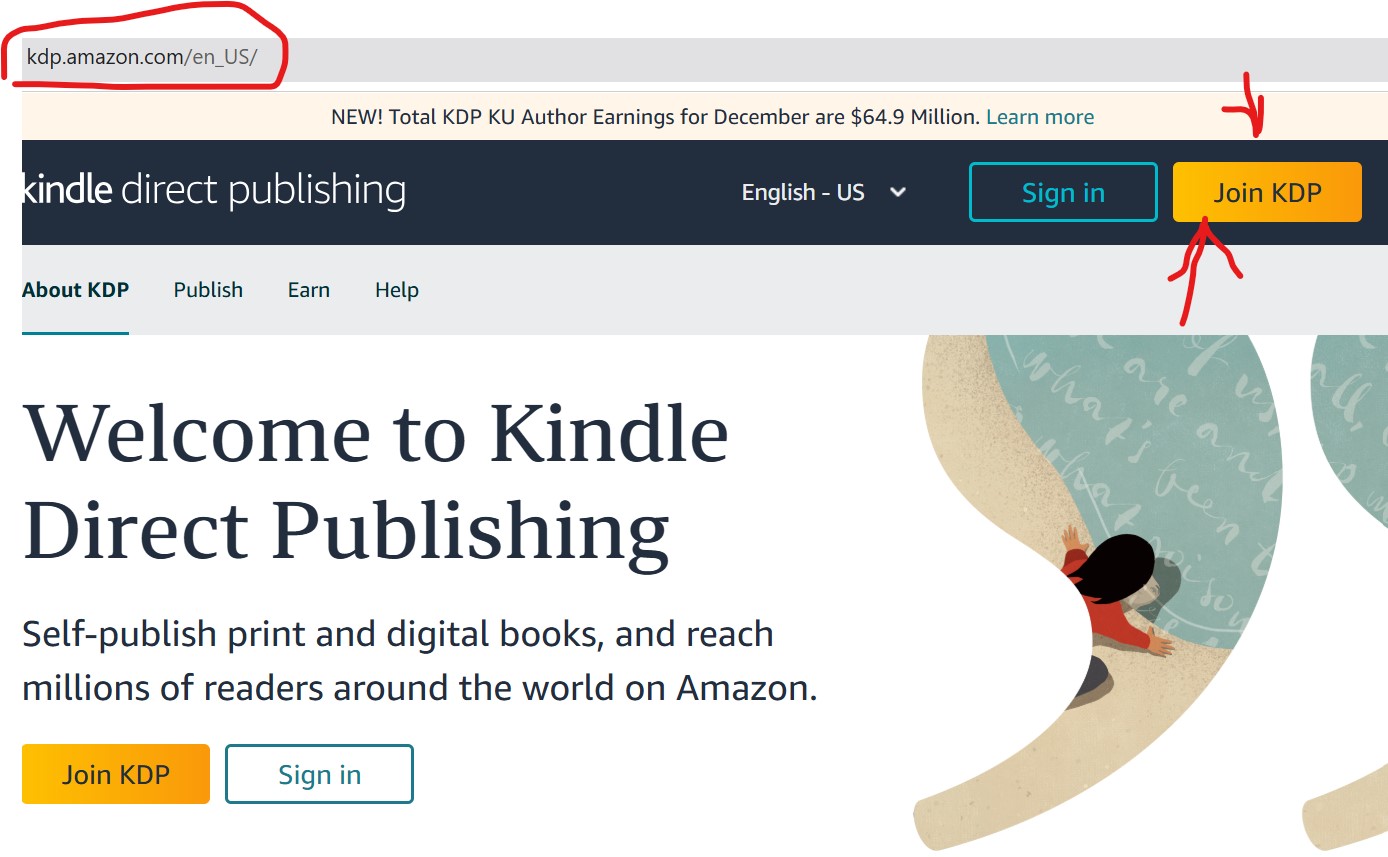
You have to create your Amazon KDP Account. Follow these steps one by one. So, first of all, go to your browser, type kdp.amazon.com, you will “sign in and join KDP”, or Sign up.
Click either “Join KDP” or click “Sign up”. Try and login using that amazon account always. So let us presume that you are yet to sign up. Click “join Kdp” or “sign up” check the image below.
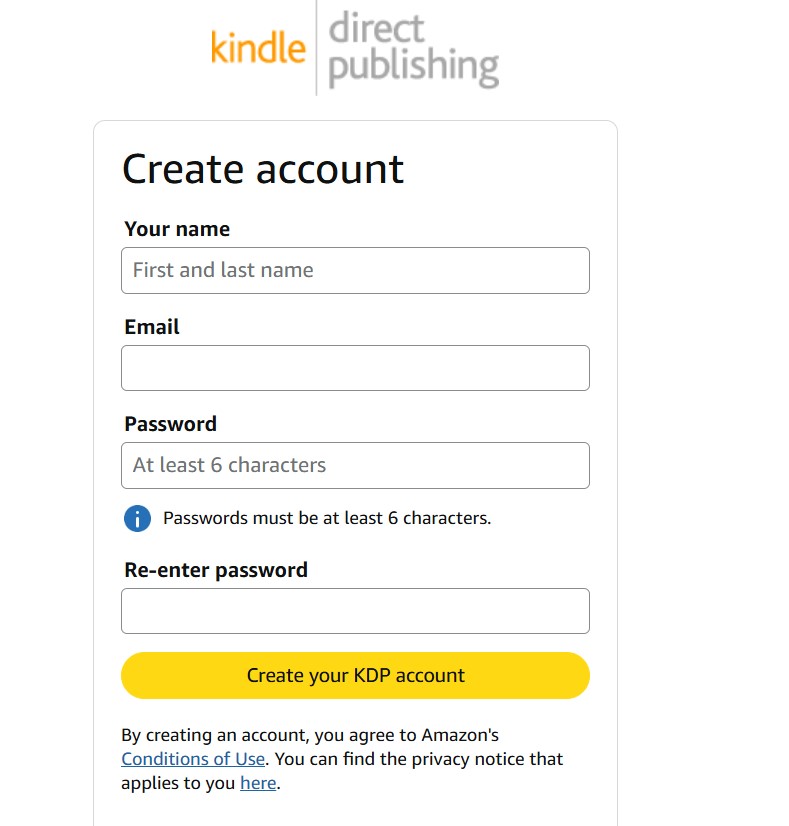
Step 3: When you click the sign up or join Kdp, there will be spaces where you will have your information like: Your name, Email, Password (Passwords must be at least 6 characters) and the Re-enter password. Then Click where it says “create your KDP account”. By clicking that you immediately create your account. Check the image below
Or Amazon will send a code to that email to Verify email address You will receive a message like “To verify your email , we’ve sent a One Time Password (OTP) to ……@gmail.com, Then check your email and enter security code, then click “create your Amazon Account”. Then Amazon will show you an agreement to agree. Scroll down, you will see “Agree”, click agree.
Step 3
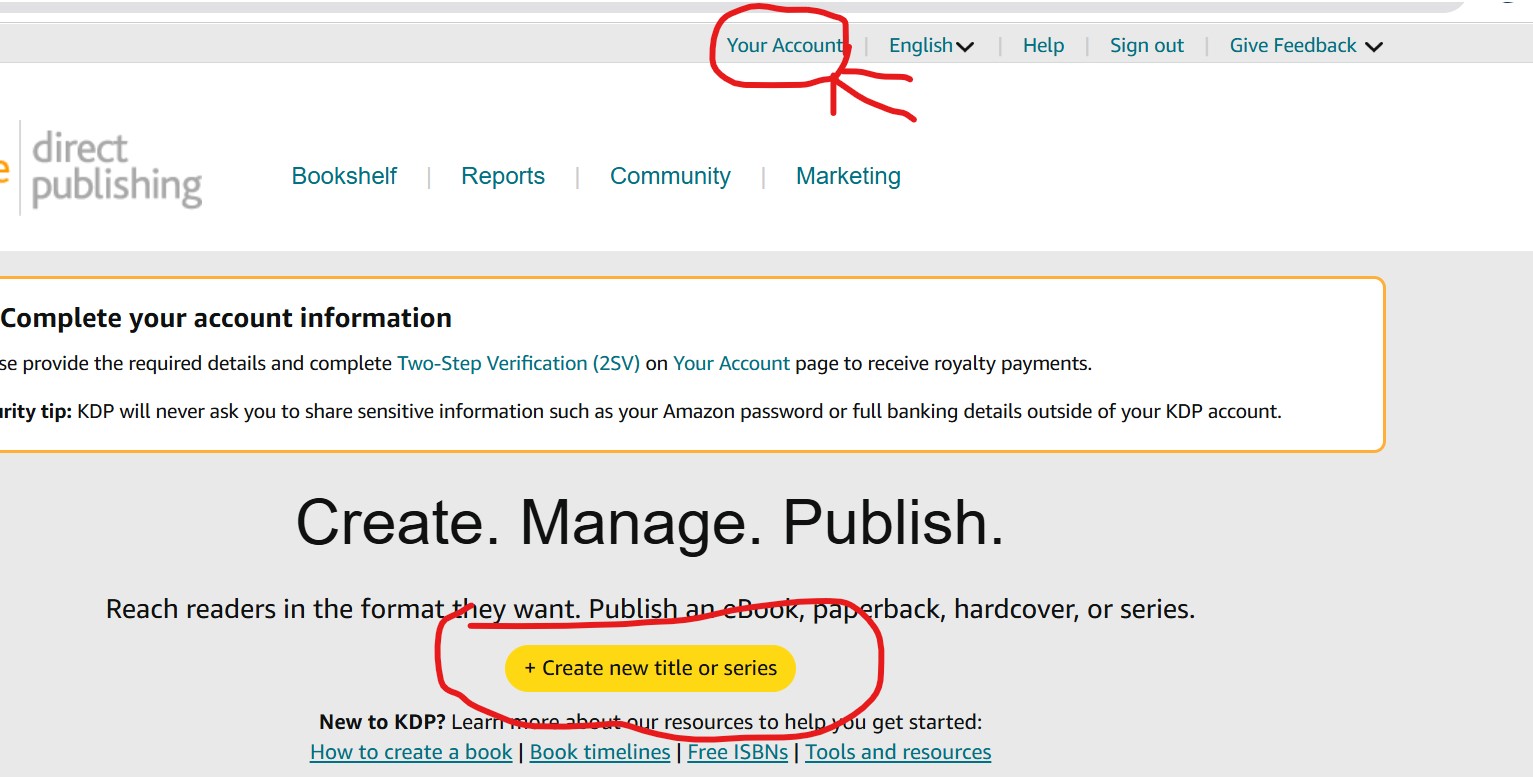
You have to authenticate your account. Click your account as shown in the image below.
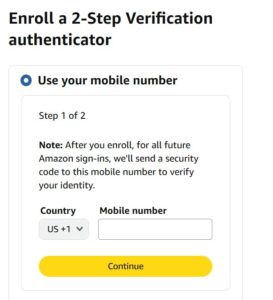
a. Then fill in the information, choose our country and mobile number to call you on the phone check the image below. They will send you OTP to your number for verification.
b. Try and put that number to the OTP Box at the amazon website, after verification, they will send you again, a login page, to re-login with your password.
c.They might require another login verification, where you must receive the code through your whatsapp. If they show another verification, choose your whatsapp. They will send another code to your whatsapp.
d. Amazon, will send another form to identify yourself. You have to enter your details as they appear on your government-issued ID. For corporations and non-individual entities (e.g., LLC or agency), enter the details of an authorized representative.
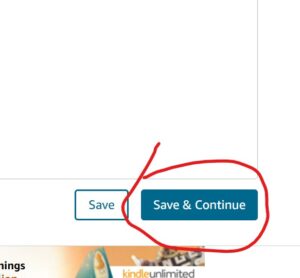
You have to put your Legal names comprising your Full Name*, Address, Country*, Postal Code*, State/Province/Region*, City*, Address Line 1*, Address Line Other details, Date of Birth (MM/DD/YYYY)*, Phone number* Then click the “save and continue. Check the image below
You have to Select your business type and confirm your information. Choose individual but if your representing a corporate entity, choose “corporation”
Step 4.
a. Getting paid, you have to fill out your back details. Provide your bank information to receive electronic royalty payments. They will ask you “Tell us about your bank.”
b. In the space “Where is your bank?” choose your country. They may require that the bank account be either issued by a bank or managed by a Payment Service Provider that is part of the Payment Service Provider Program.
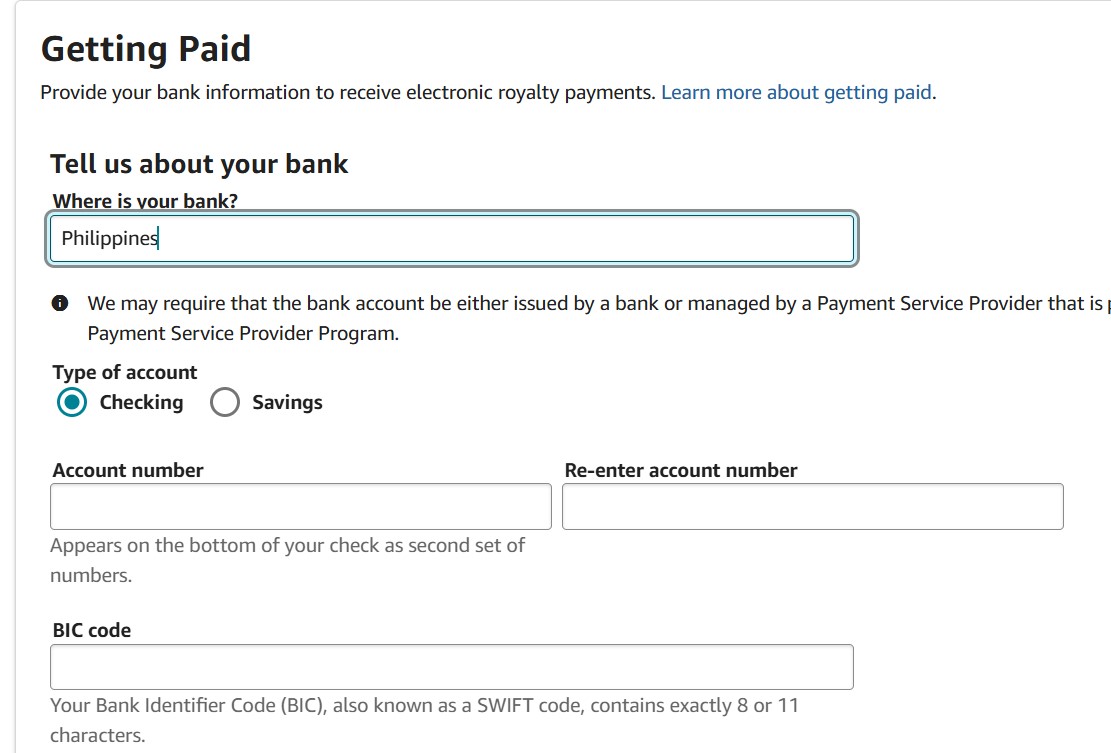
Then choose whether the account is a Checking or Savings account . Put the Account number and re enter the account number.
c. Next, fill in the BIC code. It is called Your Bank Identifier Code (BIC), also known as a SWIFT code, and contains exactly 8 or 11 characters. To find your banks swift code, simply search it on google, Example search “Fcmb Nigeria Swift Code”
d. Next scroll down, they will ask you to choose your business type again, choose “Individual” or you choose corporation, if you are doing it for a company.
e. Then enter your Date of Birth or enter the Date of Birth for the recipient of the funds. It will be in this format “Month/date/ year.
f. Then enter the account Holders Name: Enter the name of the person or entity associated with the bank account. The name must match to the one on our bank account. If the name doesn’t match your bank’s records exactly, they may not be able to deposit payments to your account.
g. Next choose your existing address, if you are the one registering, but if you are doing it for another person, you can choose another address of the recipient or receiver. ,
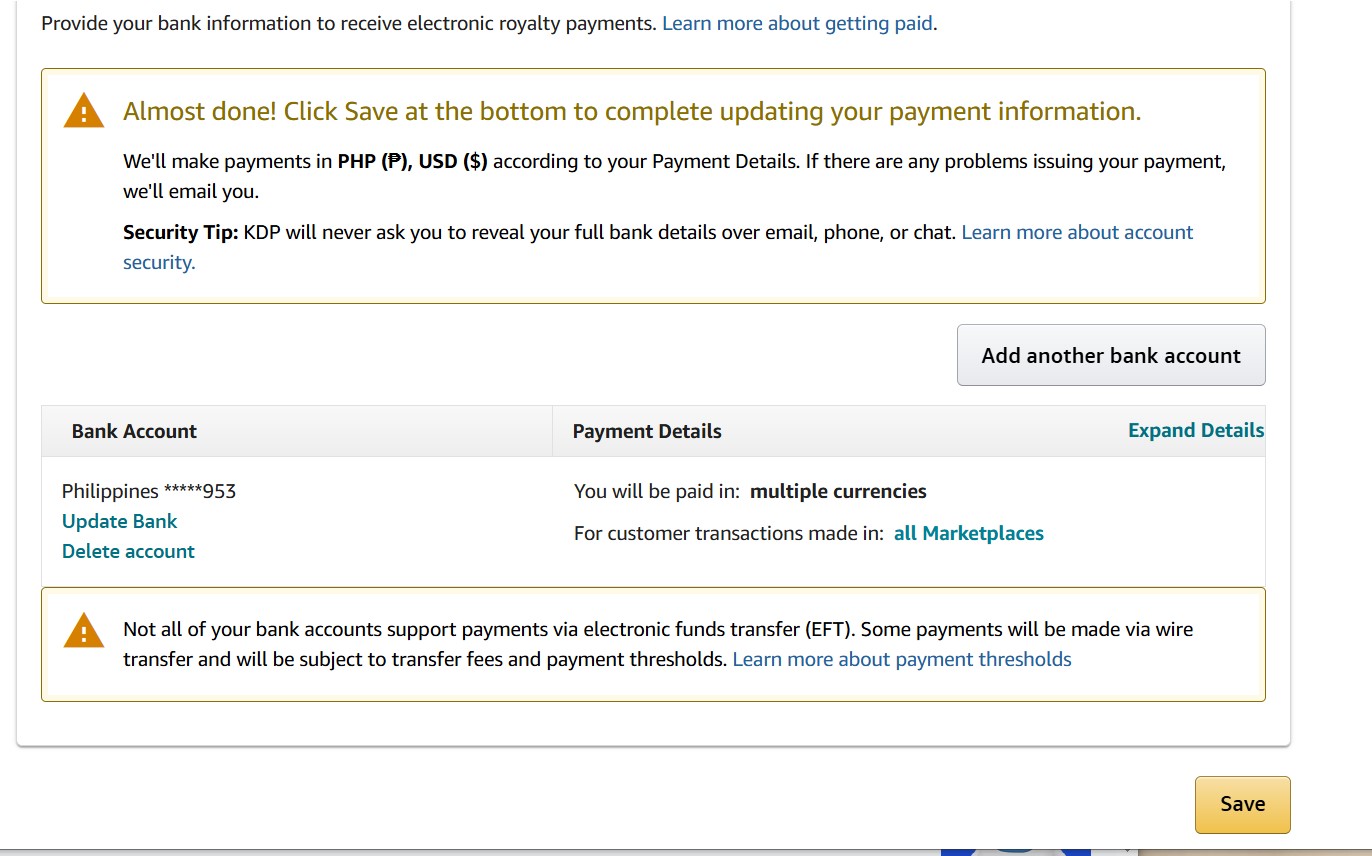
then click “add”. You will receive a message like the image below. Then click save. It will tell you that you are all set. It is successful.
Step 5.
Add Your Tax Information.
a. Here, you need your TIN. Then check your top left, you will see “tax Information”.
Click on “tax information”, you will see “complete your tax information”
next , click on that , for your tax classification, choose “individual”, select, that “you are not a US Citizen” as in the image below.
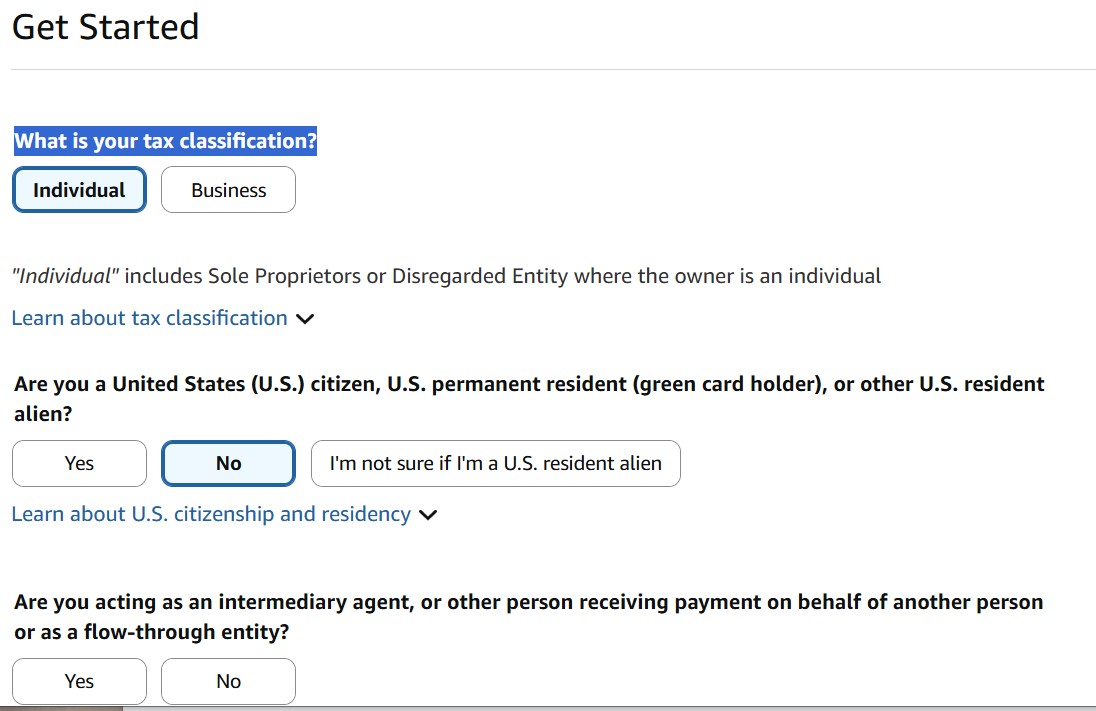
b. Are you acting as an intermediary person: select “No”
c. Next fill your Tax Identity Information, write “Full name”, Country of citizenship, and Permanent address (use address of where you live), tick your Mailing address to be Same as permanent address. Tick Taxpayer Identification Number (TIN) “I have a Non-US TIN”
Then in the box provided below, put your “Tax Identification Number (TIN)”
Next, they will check whether the selected country qualifies for treaty benefits., they will mark it green, then you click “Confirm” then click, “save and Preview”.
They will provide you a certificate that looks like the image below.
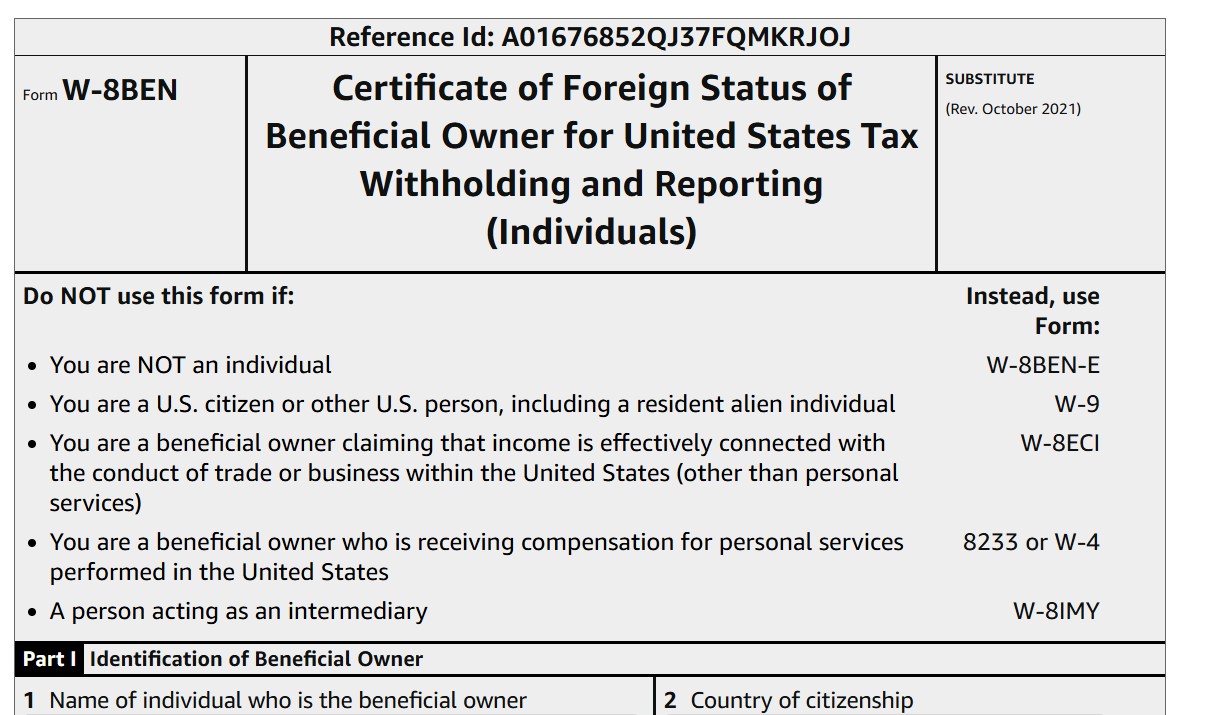
Scroll down and tick “I certify that I have the capacity to sign for the person identified on line 1 of this form.”
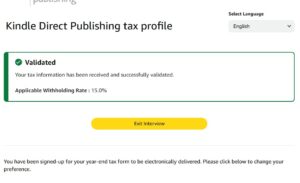
Then for the Signature, (Type your full name), as it is before, then scroll down and click “Submit” you will receive a message that your tax information is received and validated as seen in the image below. Then Exit.
In the next lecture, we will proceed with how to upload your books. Remain attentive.
Interesting 🤔
Have gone through the lecture. Thanks Father for your patience and encouragement.
ASPI2025043
I don’t have a number
Wow so detailed and comprehensive. Thank you Padre. God will continue to strengthen you.
08052088031. I do not have an ID yet Fr.
This is great, thanks so much Padre
08166756697, I don’t have ID
I don’t have an ID yet padre
08169437887
AspI2025157
07036511703… done
Aspirers ID: ASP 2025091
WOW nice one